
Welcome to Gingerbread Houses
The tradition of making gingerbread houses for Christmas is something I grew up with in Norway, and I think I was about 12 years old when I made my first house, a small log cabin that threatened to fall apart throughout the whole Christmas period - but actually stood erect until my brother was allowed to use a hammer on it on New Years Eve. In Norway the children often eat the gingerbread house when Christmas is over, whilst parents and other grown-ups will have the 3-4 weeks period the house stands uncovered in the living room exposed to dust in mind, and usually decline any offers of a taste. Over the years I have made many gingerbread houses, some of them bought as a self-assembly kit when time was short (they can be bought in any supermarked in Norway). In 2002 I decided to design the biggest gingerbread house I could possibly manage to put together, and this web-site explains how you can make one just like it or a smaller version if you prefer.
Making a gingerbread houses is a project that will take some time regardless of the size of the house. Don’t expect it to be a quick job you can finish in one evening!
Use this list to plan all the stages:
1. Buy all the ingredients for the dough
2. Print out all the patterns and cut them out
3. Make the dough, allowing for refrigerating for at least over night.
4. Roll out the dough, cut the pieces and bake.
5. Leave the ready baked pieces for drying for at least a day, up to a week.
6. Buy all the sweets for decoration and a piece of MDF. Buy fairy lights if required.
7. Decorate all the pieces on a flat surface, leave to dry for a few hours or a day.
8. Put the house together using melted sugar.
9. Finishing touch-ups with more sweets and icing sugar.
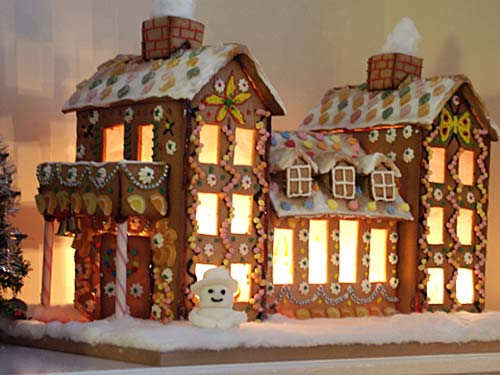
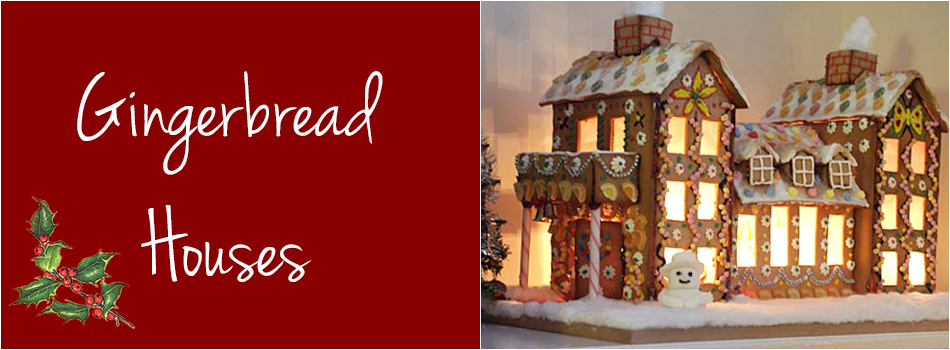
The last Gingerbread house I made, in 2002 - a long time ago!
On this website you will find all the information you need to enable you to make exactly the same type of gingerbread house as on this photo including pattern. Please also see the visitor page to see how other people have used the patterns and the different types of decorations used. Some of the photos I have received over the years have been of truly spectacular creations, much better than the one I made back in 2002!
If you use my patterns, please send me photos of your finished gingerbread house so I can include them on the visitor page, see here for details. And a message in my Guestbook is always appreciated, I answer all my messages personally, just remember to leave your email. Alternatively you can find me on Facebook or my blog and follow the different creative work I am now into.
Thanks for visiting! |
 |
||
Helene U. Taylor |
|||